Banana bread with oatmeal no flour recipe that’s naturally sweetened, protein-packed, and ready in 40 minutes. Healthy, affordable, and incredibly delicious!
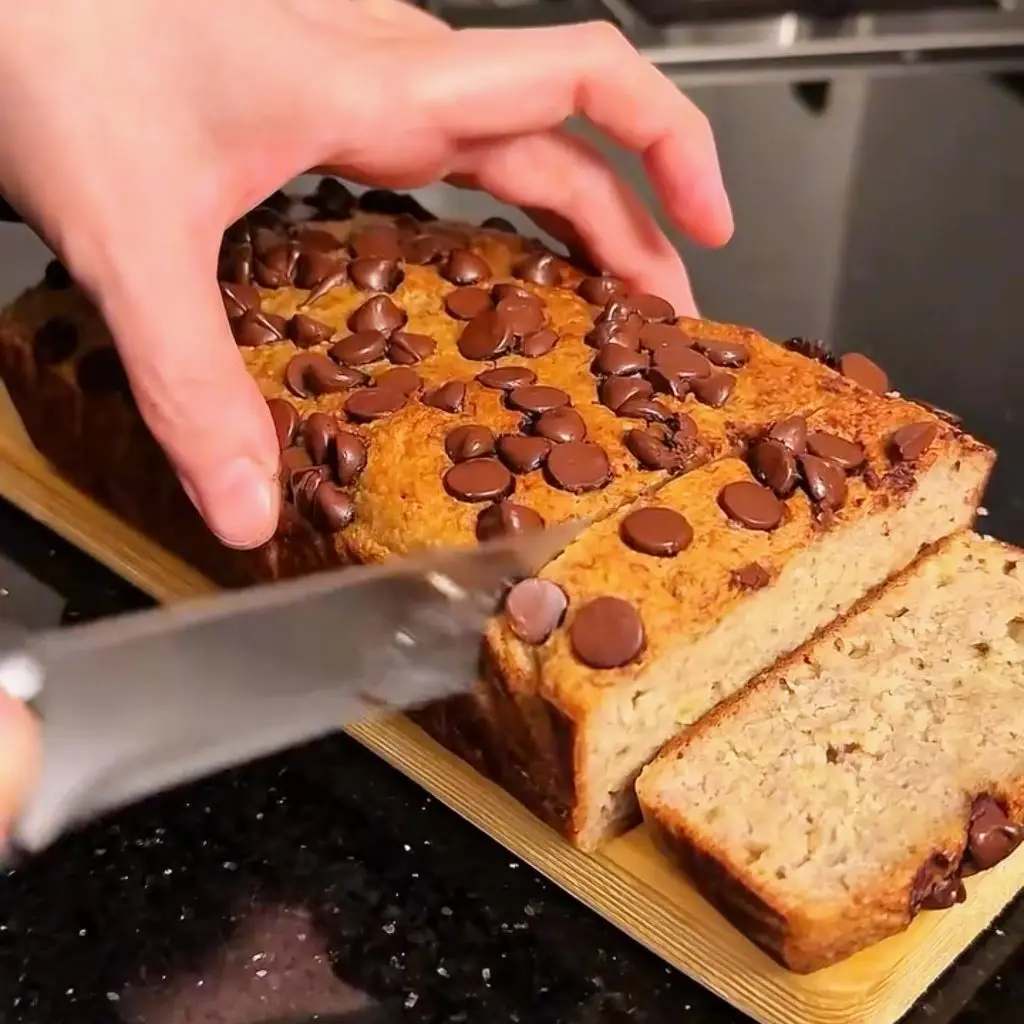
Table of Contents
The Perfect Banana Bread with Oatmeal No Flour You’ve Been Craving
Let’s be honest—traditional banana bread is loaded with refined flour, cups of sugar, and butter that leaves you feeling sluggish. But what if you could enjoy a slice (or three) of banana bread with oatmeal no flour that’s genuinely good for you? That’s exactly what this recipe delivers.
At Balanced Treats, we believe dessert should never mean compromise. This flourless oat banana bread proves you can have a treat that’s healthy, quick to make, affordable, and absolutely delicious. No fancy ingredients, no complicated techniques—just wholesome goodness that tastes like indulgence.
Why This Banana Bread with Oatmeal No Flour Is a Perfect Balanced Treat
This recipe embodies everything we stand for:
- Healthy: Made with whole grain oats, naturally sweetened with bananas and agave, and packed with 4g of protein and 3g of fiber per slice. According to the USDA’s dietary guidelines, whole grains like oats support heart health and digestive wellness.
- Quick: Just 10 minutes of prep time and 40 minutes in the oven. No stand mixer, no complicated steps—perfect for busy weeknights.
- Affordable: Every ingredient costs under $15 total, and you probably already have most of them in your pantry. That’s less than $1.25 per serving!
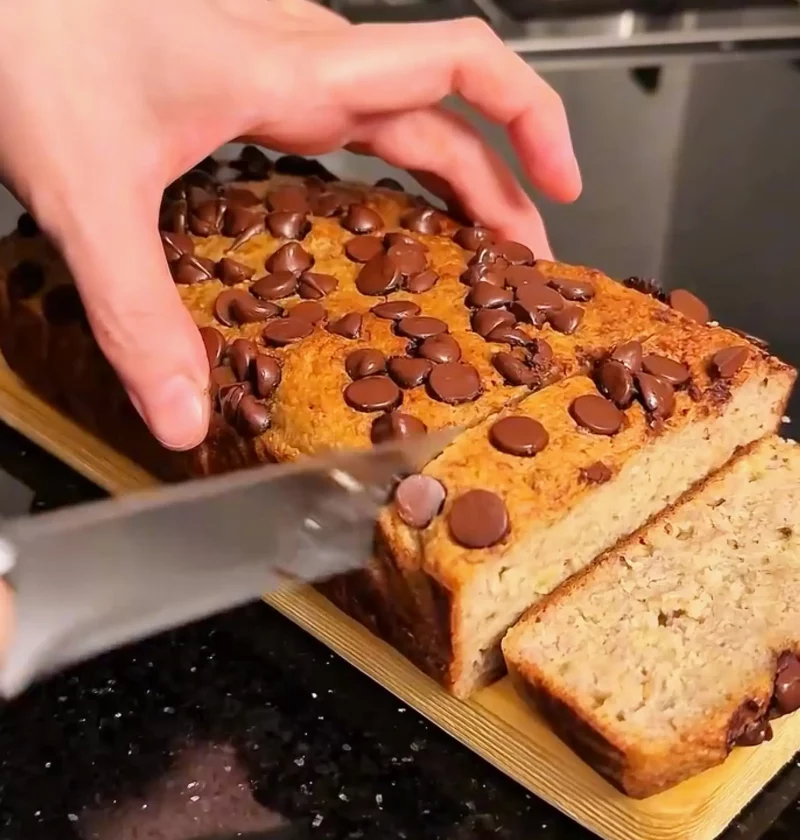
- Delicious: Moist, naturally sweet, with optional dark chocolate chips for that bakery-style finish. Your family won’t believe it’s healthy.
The Secret Behind This Flourless Banana Bread Recipe
Why Oats Are Your New Baking Best Friend
The magic of this banana bread with oatmeal no flour lies in one simple swap: ground oats replace all-purpose flour. When you blend rolled oats into a fine powder, you create a naturally gluten-free flour alternative that’s higher in fiber, protein, and essential minerals like magnesium and iron.
Unlike refined white flour that spikes blood sugar, oat flour provides steady energy without the crash. Plus, oats contain beta-glucan, a type of soluble fiber that keeps you feeling satisfied longer—perfect for a breakfast treat or afternoon snack.
Naturally Sweetened, Never Processed
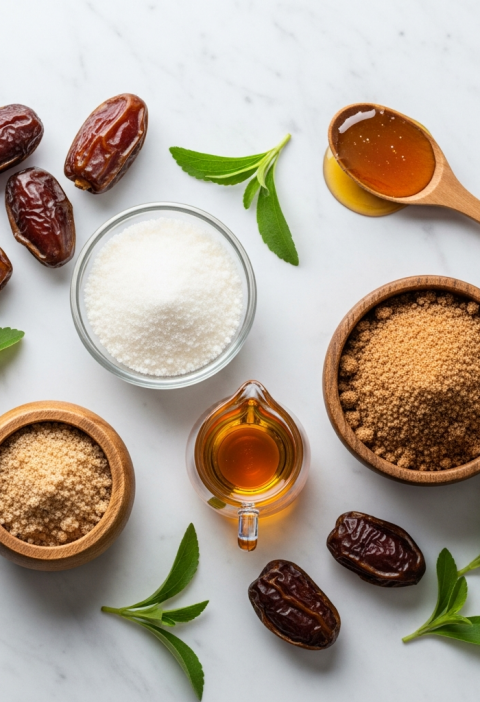
We’re using ripe bananas and agave syrup instead of refined sugar. The riper your bananas (think brown spots!), the sweeter and more flavorful your bread becomes. This easy banana bread with oats and no flour lets the natural sweetness shine through, delivering about 40% less sugar than traditional recipes.
How to Make Banana Bread with Oatmeal No Flour
The Simple Process
Making this healthy flourless banana bread couldn’t be easier. Start by transforming your rolled oats into flour—a 30-second job for any blender. While those oats are getting their makeover, grab your ripest bananas (seriously, the spottier the better) and mash them until smooth.
Here’s where the magic happens: you’ll blend together your mashed bananas, eggs, agave syrup, milk, and baking powder until everything’s silky smooth. The eggs provide structure and protein, while the baking powder gives you that perfect rise without any chemical aftertaste.
Fold in your freshly ground oats, and you’ve got a thick, luscious batter that practically pours itself into your prepared pan. The optional dark chocolate chips on top? That’s your “yes, this is actually healthy” moment that looks Instagram-worthy.
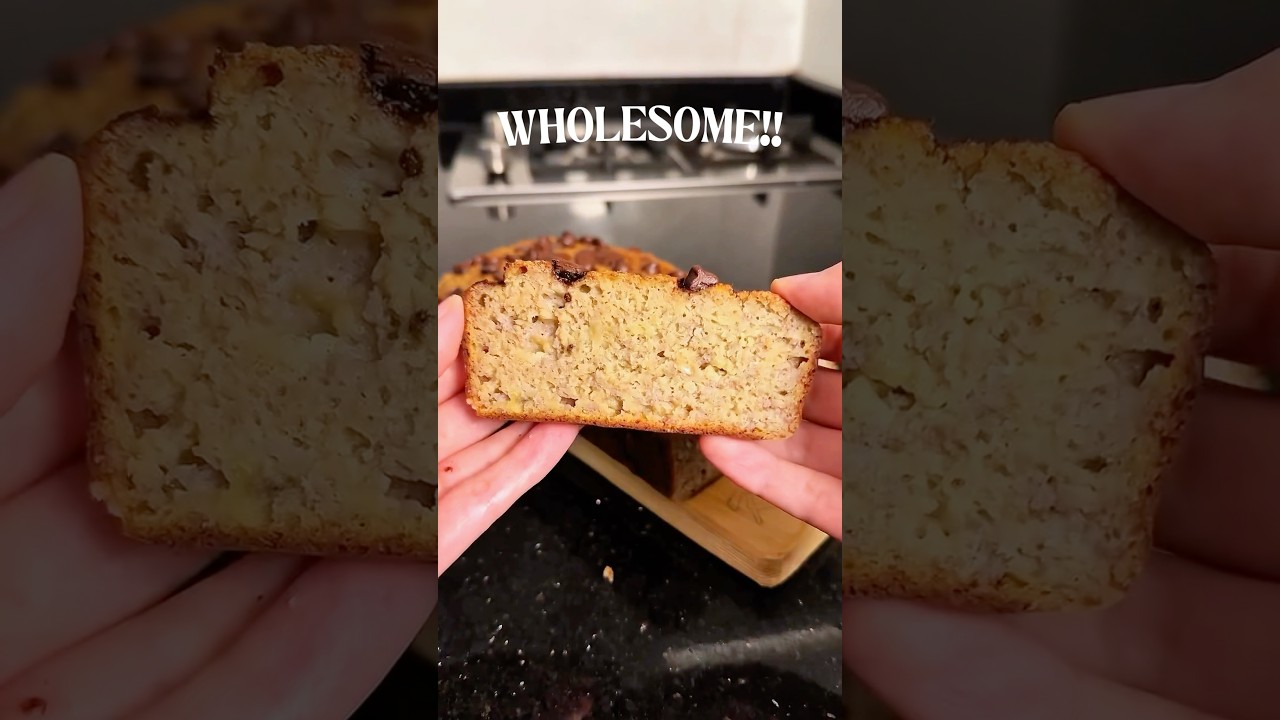
After 40 minutes at 350°F, you’ll pull out a golden-brown loaf that fills your kitchen with the most incredible aroma. Let it cool (the hardest part, honestly), slice, and prepare for compliments.
Pro Tips for Perfect Results
The Banana Factor: Use bananas that are almost overripe. They should be yellow with brown spots and slightly soft to the touch. This ensures maximum natural sweetness and moisture.
Texture Control: For a chunkier texture, reserve some mashed banana to fold in at the end. For ultra-smooth bread, blend everything completely.
Storage Savvy: This banana bread with oatmeal no flour stays moist for 3 days at room temperature, up to a week refrigerated, or 3 months frozen. Wrap individual slices for grab-and-go breakfasts!

Flourless Oat Banana Bread
Description
Naturally sweetened banana bread made with ground oats, ripe bananas, and optional dark chocolate chips. No flour, no refined sugar—just wholesome ingredients.
Ingredients
Instructions
- Preheat your oven to 350°F (175°C). Line a 9×5 inch loaf pan with parchment paper or grease it lightly with cooking spray. Set aside.
- Add 2 cups of rolled oats to a high-speed blender or food processor. Blend on high for 30-60 seconds until the oats turn into a fine flour consistency. Set aside.
- Peel your three ripe bananas and place them in a large mixing bowl. Using a fork or potato masher, mash the bananas until completely smooth with minimal lumps.
- To the mashed bananas, add 2 eggs, 6 tablespoons of agave syrup, 4 tablespoons of milk, and 2 teaspoons of baking powder. Using a whisk or electric mixer, blend all the wet ingredients together until the mixture is completely smooth and well combined.
- Gently fold the ground oat flour into the wet banana mixture using a spatula. Mix until just combined—don’t overmix, as this can make the bread dense. The batter should be thick but pourable.
- If using, fold in the dark chocolate chips, reserving a few to sprinkle on top for presentation.
- Pour the batter into your prepared loaf pan. Use a spatula to spread it evenly and smooth the top. Sprinkle the remaining chocolate chips on top.
- Place the pan in the preheated oven and bake for 40 minutes, or until a toothpick inserted into the center comes out clean or with just a few moist crumbs. The top should be golden brown and slightly cracked.
- Remove the banana bread from the oven and let it cool in the pan for 10 minutes. Then transfer it to a wire rack to cool completely before slicing. This helps the bread set properly and makes slicing easier.
- Slice into 12 pieces and enjoy! Store leftovers in an airtight container at room temperature for up to 3 days, or refrigerate for up to a week.
Preheat and Prepare
Make Oat Flour
Mash the Bananas
Mix Wet Ingredients
Combine with Oat Flour
Add Chocolate Chips
Transfer to Pan
Bake
Cool and Serve
Enjoy
Notes:
- Storage: Store in an airtight container at room temperature for up to 3 days, refrigerate for up to 1 week, or freeze individual slices for up to 3 months.
- Substitutions: Swap agave syrup for maple syrup or honey. Use any milk (almond, oat, dairy, or coconut). For a vegan version, replace eggs with 2 flax eggs (2 tablespoons ground flaxseed + 6 tablespoons water, let sit 5 minutes).
- Add-ins: Try walnuts, pecans, cinnamon, vanilla extract, or blueberries for delicious variations.
Nutrition Facts
Servings 12
Serving Size 1 slice
- Amount Per Serving
- Calories
- 145kcal
- % Daily Value *
- Total Fat 3g
- 5%
- Sodium 85mg
- 4%
- Total Carbohydrate 26g
- 9%
- Dietary Fiber 3g
- 12%
- Sugars 11g
- Protein 3g
- 6%
* Percent Daily Values are based on a 2,000 calorie diet. Your daily value may be higher or lower depending on your calorie needs.
Substitutions:
- Sweetener: Feel free to swap agave syrup with maple syrup, honey, or even coconut sugar for different flavor profiles.
- Milk: Any milk works—dairy, almond, soy, oat, or coconut milk are all great options.
- Add-ins: Customize your banana bread with walnuts, pecans, blueberries, cinnamon, or vanilla extract.
- Vegan option: Replace eggs with 2 flax eggs (2 tablespoons ground flaxseed + 6 tablespoons water, let sit for 5 minutes).
Tips for Success:
- Use very ripe bananas with lots of brown spots—they’re sweeter and blend better.
- Don’t skip blending the oats into flour; it creates the perfect texture.
- Let the bread cool completely before slicing to prevent crumbling.
- For extra moisture, add a tablespoon of Greek yogurt or applesauce to the batter.
More Oat-Based Treats You’ll Love
If you’re enjoying this banana bread with oatmeal no flour, you’ll absolutely love our Peanut Butter Oatmeal Balls! These 5-ingredient no-bake energy bites are another pantry-staple recipe that takes just 10 minutes to make. They’re perfect for meal prep—make a batch alongside this banana bread and you’ll have healthy snacks covered for the entire week. Both recipes showcase how versatile and delicious oats can be in healthy desserts, whether you’re baking or going the no-bake route.
Your New Go-To Healthy Banana Bread Recipe
This banana bread with oatmeal no flour proves that healthy baking doesn’t mean sacrificing flavor or texture. It’s the recipe you’ll return to again and again—for rushed weekday breakfasts, after-school snacks, or whenever you need something sweet that actually nourishes your body.
The best part? You probably already have everything you need to make it right now. So grab those browning bananas off your counter, fire up your blender, and treat yourself to something truly balanced.
FAQs:
Q: Can I make this recipe gluten-free? A: Yes! This recipe is naturally gluten-free friendly if you use certified gluten-free oats. Regular oats may be cross-contaminated with gluten during processing.
Q: Can I use quick oats instead of rolled oats? A: Yes, quick oats work fine, but rolled oats give a better texture. Avoid instant oats as they’re too processed.
Q: Why is my banana bread too dense? A: This could be from overmixing the batter or using bananas that aren’t ripe enough. Make sure to fold gently and use very ripe bananas.
Q: Can I make this without a blender? A: Yes! You can buy pre-made oat flour from the store instead of blending your own oats.
Q: How do I know when the banana bread is done? A: Insert a toothpick into the center—if it comes out clean or with a few moist crumbs (not wet batter), it’s ready.
Q: Can I double this recipe? A: Absolutely! Double all ingredients and use two loaf pans, or one 9×13 inch baking dish. Baking time may vary.
Q: Is this recipe suitable for meal prep? A: Yes! This banana bread keeps well and is perfect for meal prepping breakfast or snacks for the week.
Q: Can I reduce the sugar? A: Yes, you can reduce the agave syrup to 4 tablespoons if you prefer it less sweet. The ripe bananas provide natural sweetness.
Q: What can I use instead of eggs? A: Try flax eggs (1 tablespoon ground flaxseed + 3 tablespoons water per egg) or commercial egg replacer for a vegan version.
Q: Can I add protein powder? A: Yes! Replace 1/4 cup of the oat flour with your favorite protein powder for an extra protein boost.